Feature · Facade
The facade and the logo, in the same 3D model as the roof.
Make the 3D model look like the customer’s building. Choose the cladding and its colour, put windows, doors and garage doors where they really are, and place the company logo on the wall.
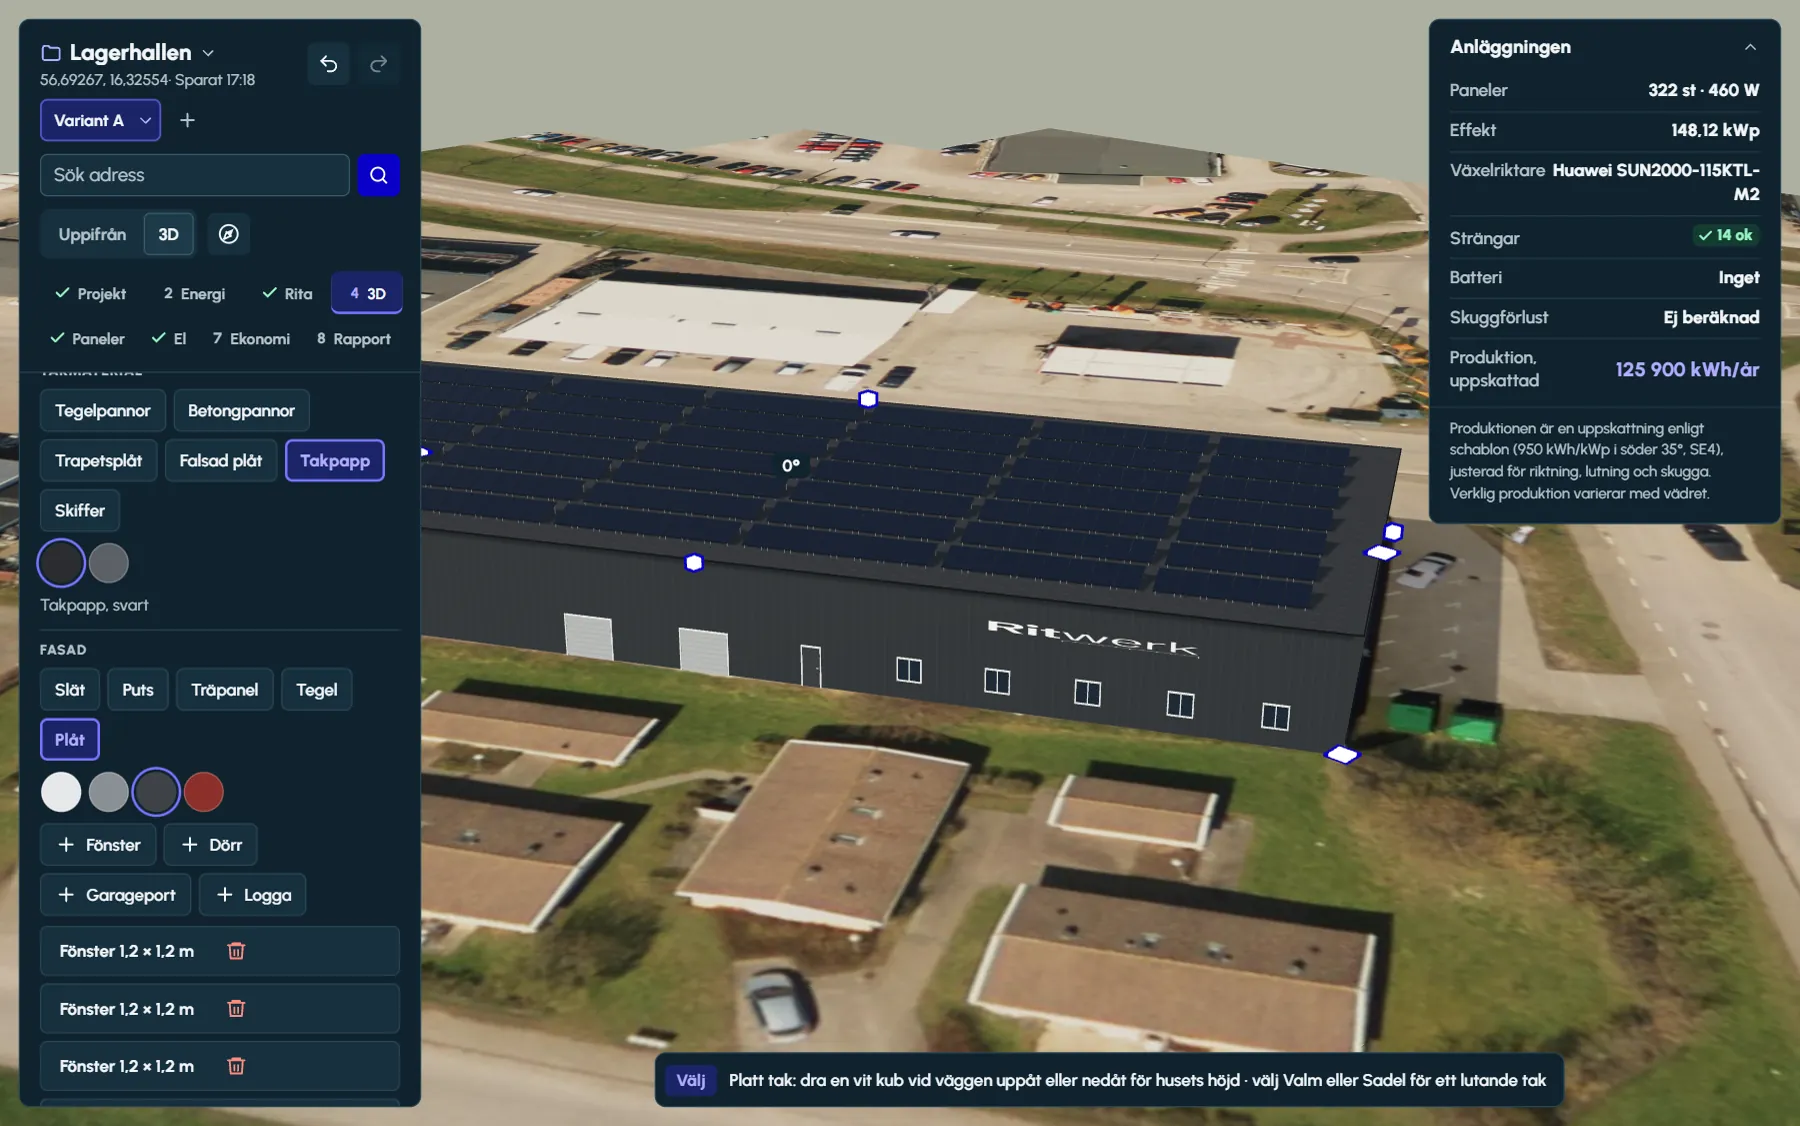
Material and colour per building part
The facade is chosen separately for each building part, so a rendered office and a sheet-metal warehouse can sit side by side. There are four materials, each with colours common on Swedish and European buildings: render (white, light grey, beige, anthracite), timber cladding (Falu red, white, grey, black, yellow), brick (red, yellow, brown, grey) and sheet metal (white, grey, anthracite, red).
With nothing chosen, the wall stays plain in a neutral colour. If you change the material, the colour is kept if the new material has it; otherwise the wall gets the material’s first colour. Windows, doors and garage doors stay where they were.
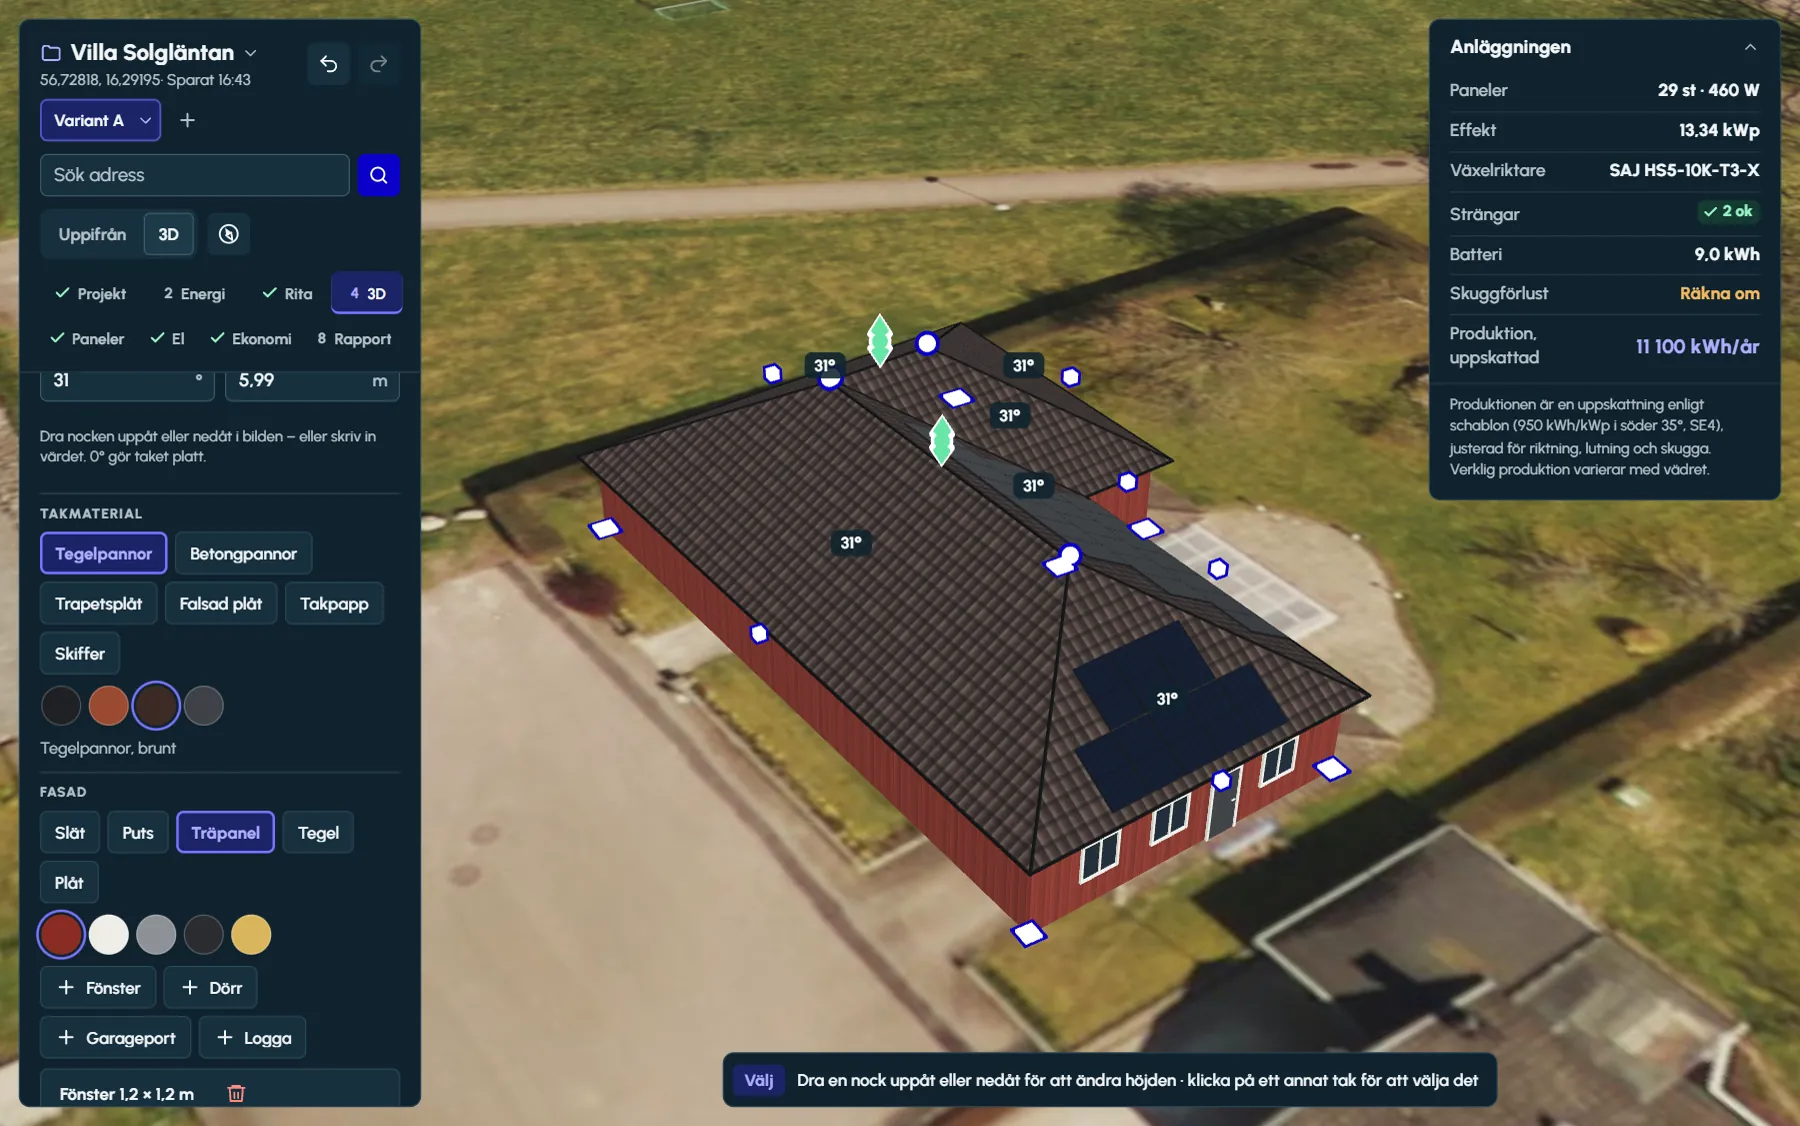
The walls stand once the roof is raised
The facade covers the walls from the ground up to the eaves. On a building part you have drawn freely, the walls only stand once the roof is raised, so choose Flat, Gable, Hipped or Inner edges before you add the facade. If you are in the view from above when you choose a window or a garage door, the view switches to 3D, where the walls are visible.
The wall height is the height of the eaves. If you change it, or move a corner of the outline, the openings follow. An opening on a wall that disappears is removed, and the others are shrunk or moved so that they still fit on their wall.
Default sizes for openings
- 1.2 × 1.2 m
- window, sill 0.9 m above ground
- 1.0 × 2.1 m
- door, from ground level
- 2.5 × 2.2 m
- garage door, from ground level
How to add an opening or a logo
Select the building
Select the building part in the view in step 4. The facade options are below the roofing material.
Choose what goes on the wall
Window, Door or Garage door – or Logo, which opens the file picker for a PNG, JPG, WebP or SVG.
Click on the wall
The opening lands where you click. Click again for more of the same kind, and finish with Esc. The logo goes on with one click, and the tool then returns to Select.
Adjust
Drag the opening along the wall and type its width, height and height above ground in metres. Delete removes it, and Ctrl+Z undoes.
Windows on the right storey
Doors and garage doors stand on the ground. A window gets its sill 0.9 m above ground, but if you click high up on the wall, above the window’s default head height plus a margin, the window is centred where you click. That way an upper storey gets its windows at the right height without any arithmetic.
Each opening appears in a list with its type and size, for example Window 1.2 × 1.2 m. Select a row, or the opening in the view, to change Width, Height and Above ground – the height of the sill. An opening is at least 0.3 × 0.3 m and is kept at least 10 cm from the corners of the wall and from the eaves, so it still fits on the wall if you type a size that is too large.
A logo that stays sharp at a distance
The logo is first placed 2.4 m wide, with its height from the image’s proportions, and centred where you click on the wall. You then change width, height and height above ground in the same fields as for the windows, so a ten-metre sign looks like ten metres next to the garage doors.
The transparency of a PNG or SVG is kept. An SVG is redrawn at 1,024 pixels on its longest side, and a larger bitmap is scaled down to the same size. A smaller bitmap is not enlarged, though, so on a wide wall a vector logo stays sharpest.
Only use a logo the customer has given you. If the customer would rather not see their logo in the proposal, the facade and the doors are enough for the building to be recognised.
Good to know
- The facade, the openings and the logo are part of the project and are kept when you save it, also as a file.
- Every choice can be undone: material, colour, each opening and the logo. The message after a click on the wall has its own Undo button.
- Windows, doors and garage doors do not affect the panels – they sit on the wall and the panels on the roof.
Questions and answers
Questions and answers
Can we show the customer’s logo on the building?
Yes. In step 4 you upload the logo as PNG, JPG, WebP or SVG, click where it goes on the wall and set its width in metres. Ritwerk shows it in 3D together with the panels.
Which facade materials are available?
Render, timber cladding, brick and sheet metal, in four or five colours each. With nothing chosen, the wall stays plain.
Can different parts of the building have different facades?
Yes. The facade is chosen per building part, so an office and a warehouse in the same building can have different materials.
How do I change the size of a window or a garage door?
Select the opening in the list or in the view and type its width and height in metres. The defaults are window 1.2 × 1.2 m, door 1.0 × 2.1 m and garage door 2.5 × 2.2 m.
Why can I not add a facade to the house?
The walls only stand once the roof is raised. Choose a roof type for the building part, for example Gable or Flat, and the facade can be added.
Read next
- The roof in 3DOutline on aerial imagery, Inner edges and the ridge in 3D – gable, hipped, mansard, flat and your own roof lines.
- Solar PV on commercial roofsFlat roofs with east–west or south-facing rows, maintenance walkways, snow and wind loads and the customer’s logo on the facade.
- Solar PV for housesDormers, heat pump, EV and battery – the house roof and the household’s electricity calculated hour by hour, with a report for the household.
- Ritwerk vs HelioScopeA tool for commercial solar with storage versus a solar designer for houses, halls and loads.
Try it on a real roof.
The designer opens in your browser, with no account. Search for an address and start drawing.