Feature · Roof
The outline on the aerial photo. The roof in 3D.
Click around the house, press Inner edges and drag the ridge to the right height. Gable, hipped, mansard and flat roofs are built-in options, and you draw your own roof lines when the house is unusual.
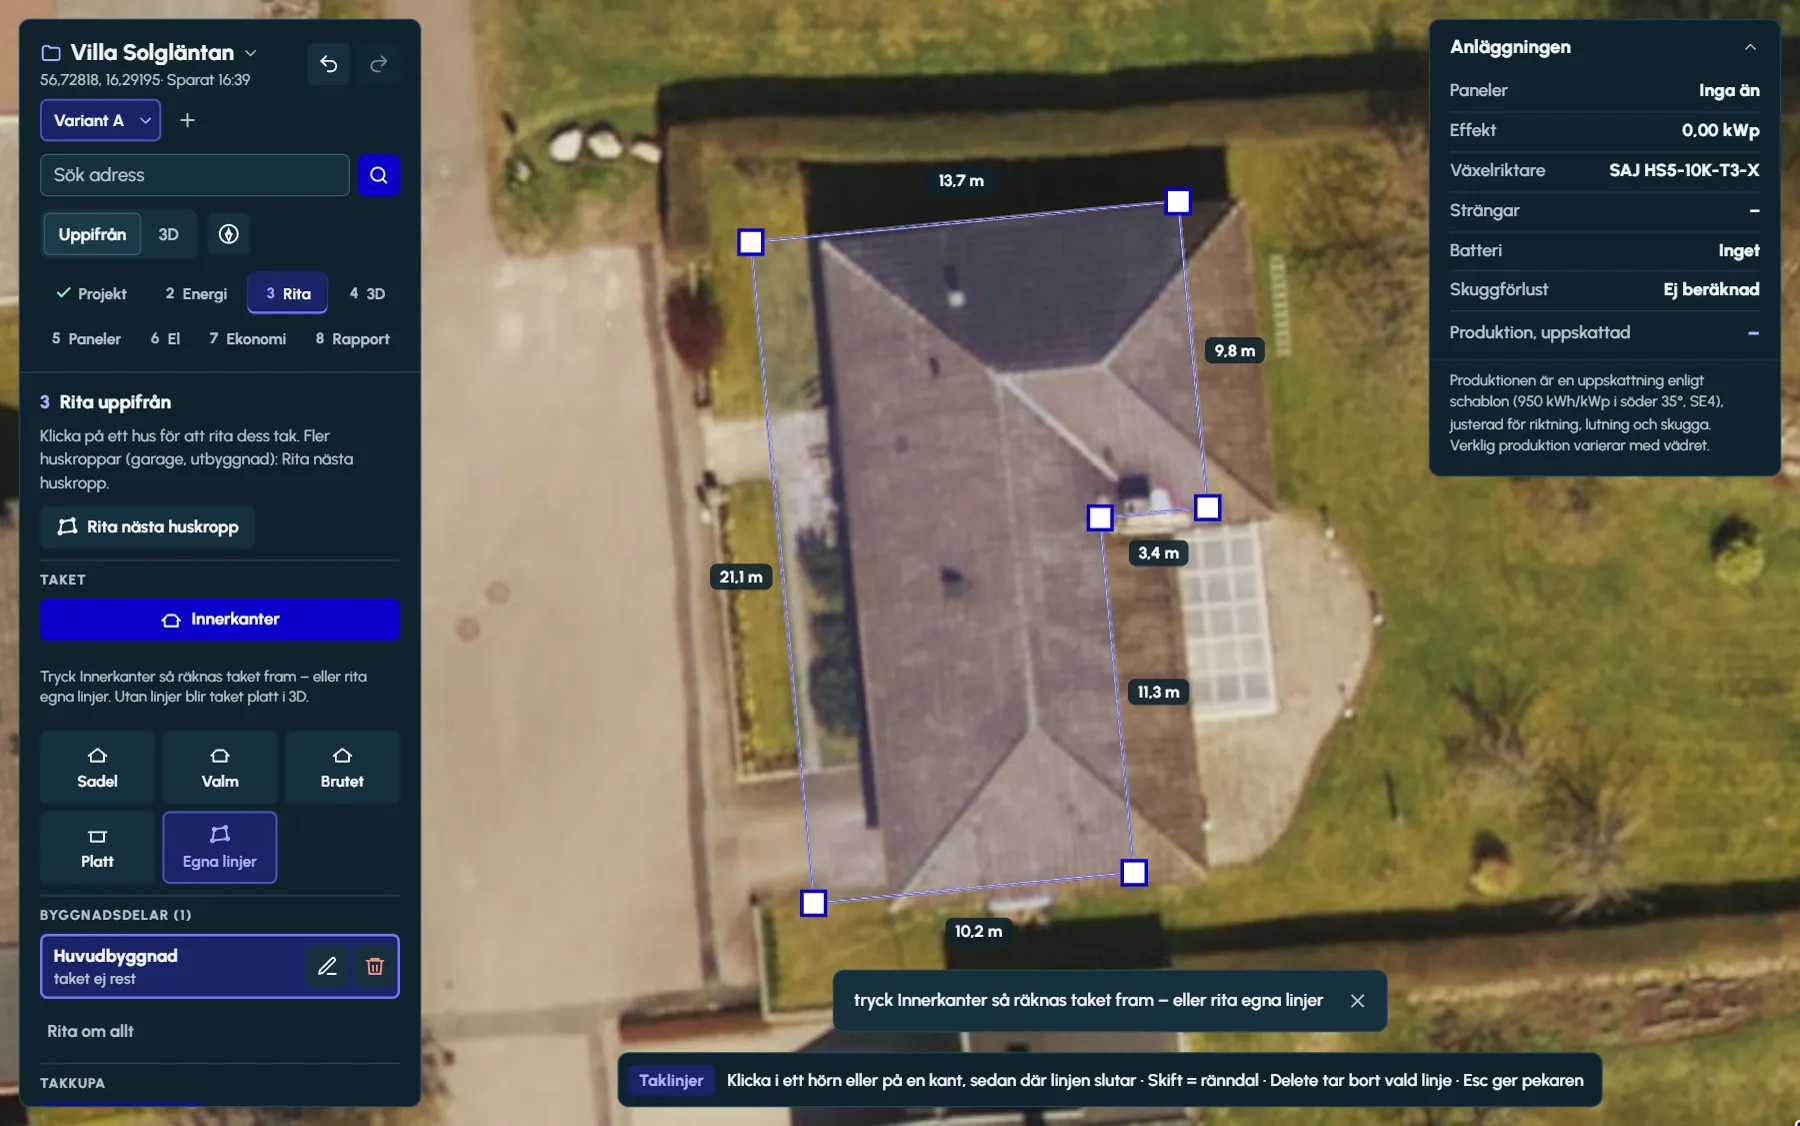
The outline first, from above
Step 3 shows the aerial photo straight from above. You click one corner at a time around the house, and the designer shows the length of each side as you draw. The outline closes with a click on the first corner, a double-click or Enter. Backspace removes the last corner and Esc cancels.
Corners snap at right angles to the previous edge, in line with other corners, to the middle of an edge, parallel to the house and to the same length as an earlier edge – and the status bar tells you which snap applies. The snap zone is a few pixels wide, so it gets narrower in metres the closer you zoom in. Hold Alt to draw freely.
If you have a dimension from a drawing, type the length and press Enter, and the next corner lands exactly that far away. The plan view zooms in to a few millimetres per pixel, and North up rotates the map so that north points straight up and centres it on the house.
Inner edges works out the roof
Inner edges reads the outline and works out the roof lines: hips at the outward corners, valleys at the inward corners and ridges where the roof slopes meet at the same height. The roof is raised at a 20 degree pitch, or at the pitch the house already has.
The same button works on L-, T- and U-shaped houses and on houses with skewed corners. If you want gables, choose Gable instead: the ends of the house and its wings then get gables instead of hips.
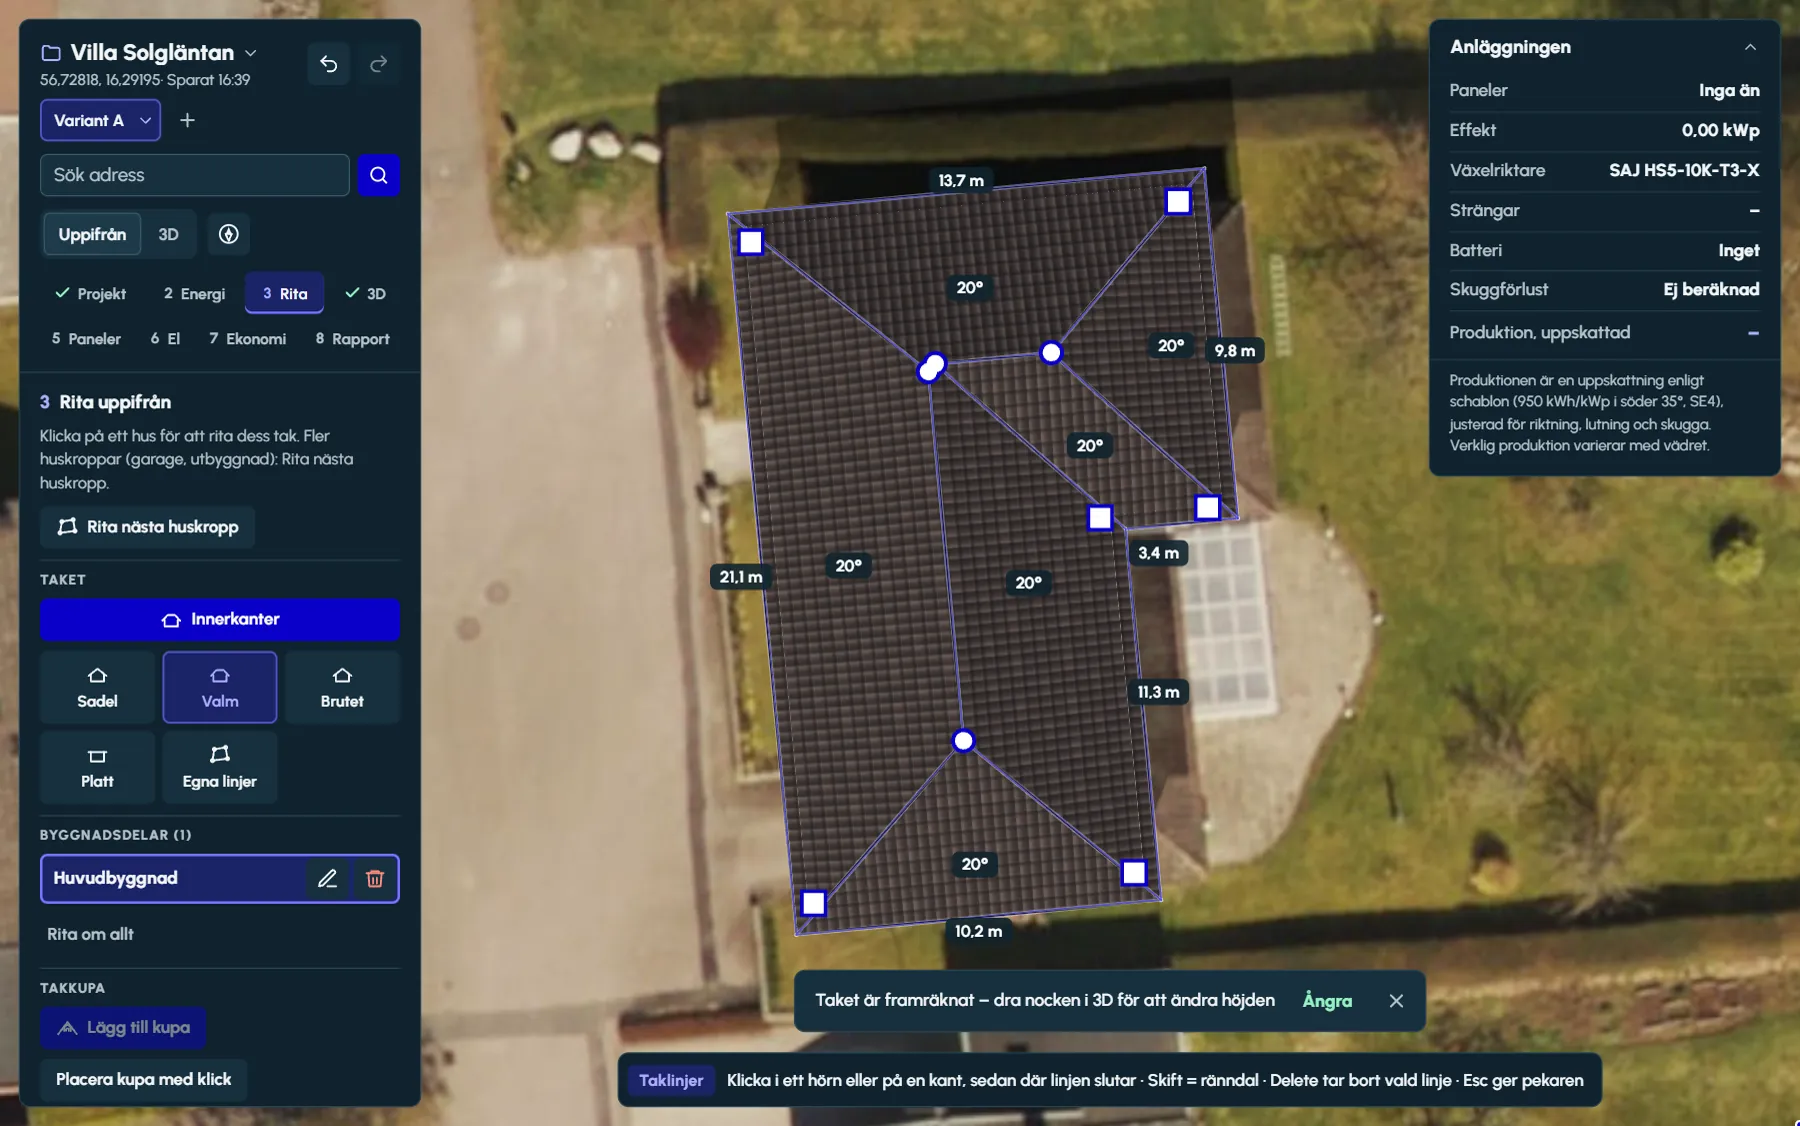
The roof types
- Gable – ridge and gables, also on the wings of L-, T- and U-shaped houses
- Hipped – roof slopes on every side, the same roof as Inner edges
- Mansard – for rectangular houses, with a break line and steeper lower slopes (60 degrees by default)
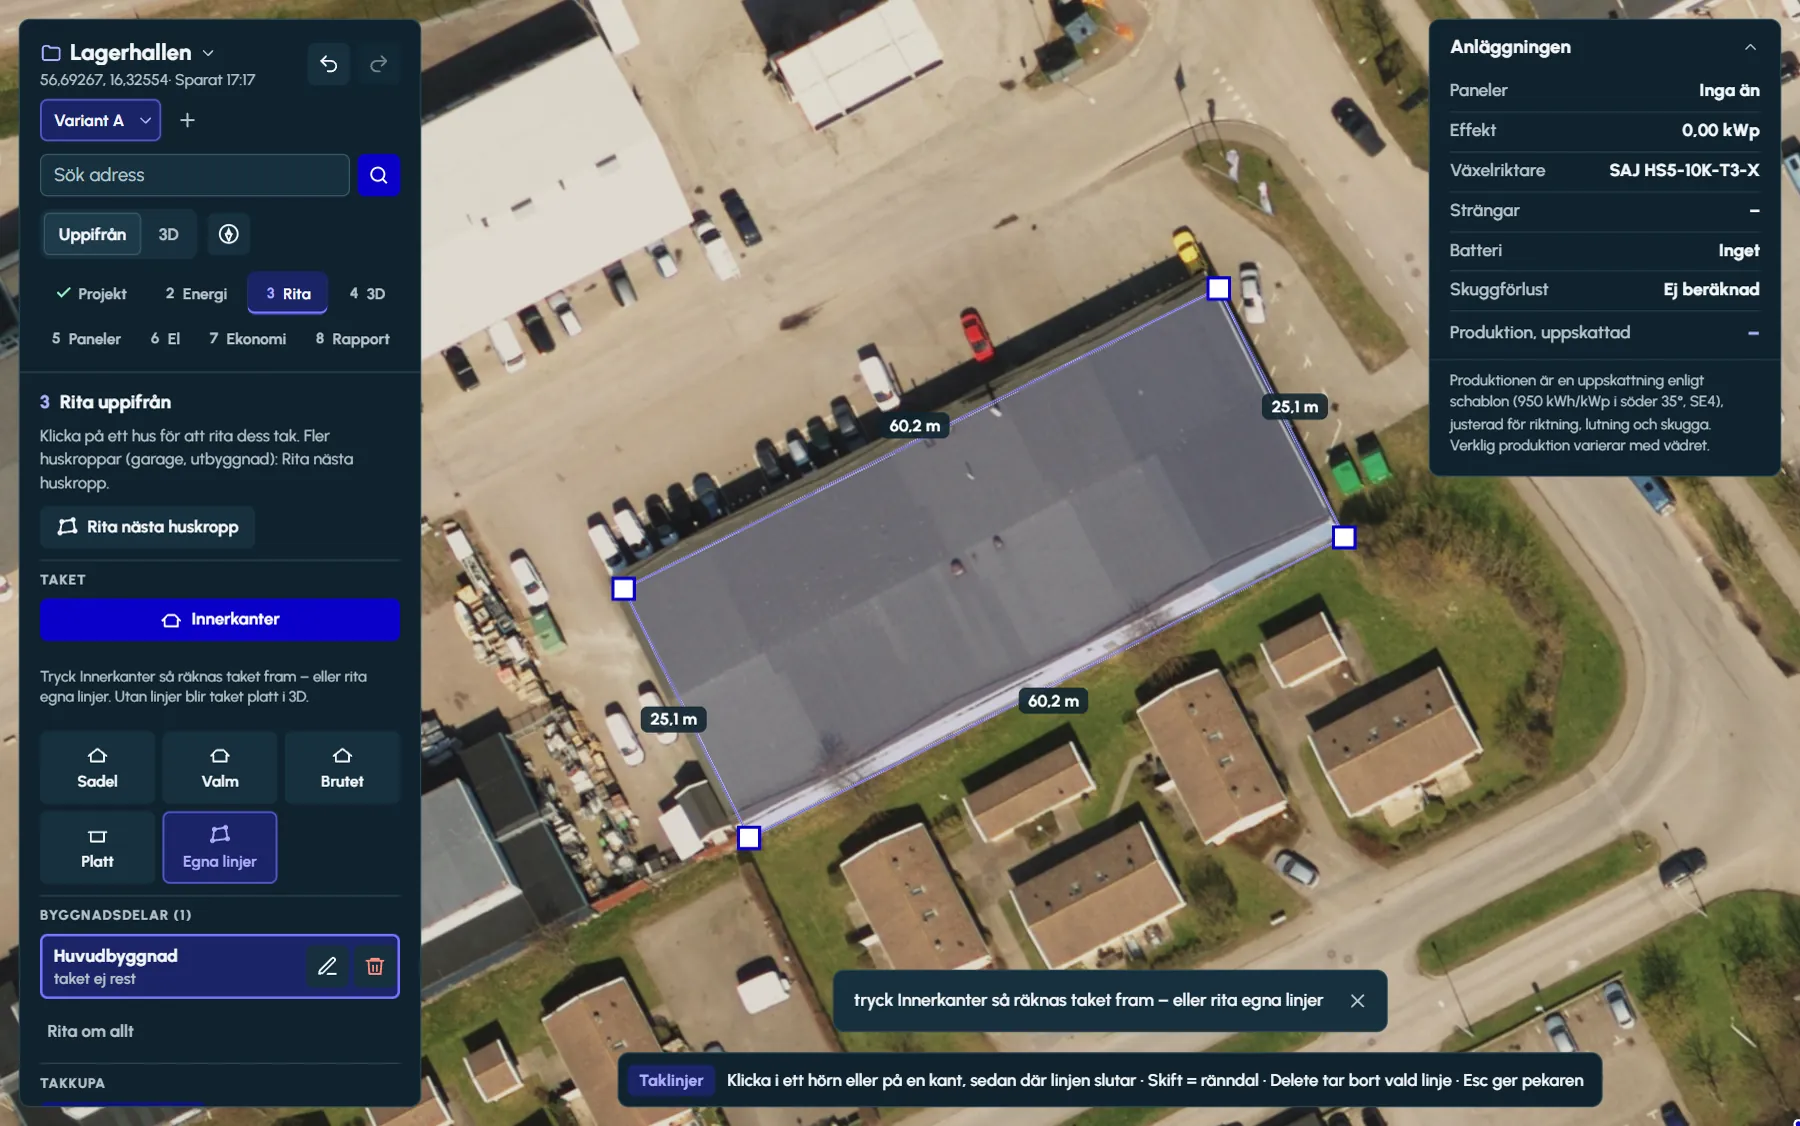
- Flat – an outline without a ridge, 0 degrees, for halls, warehouses and garages
- Own lines – ridge, hip, valley, gable and break line, drawn by hand
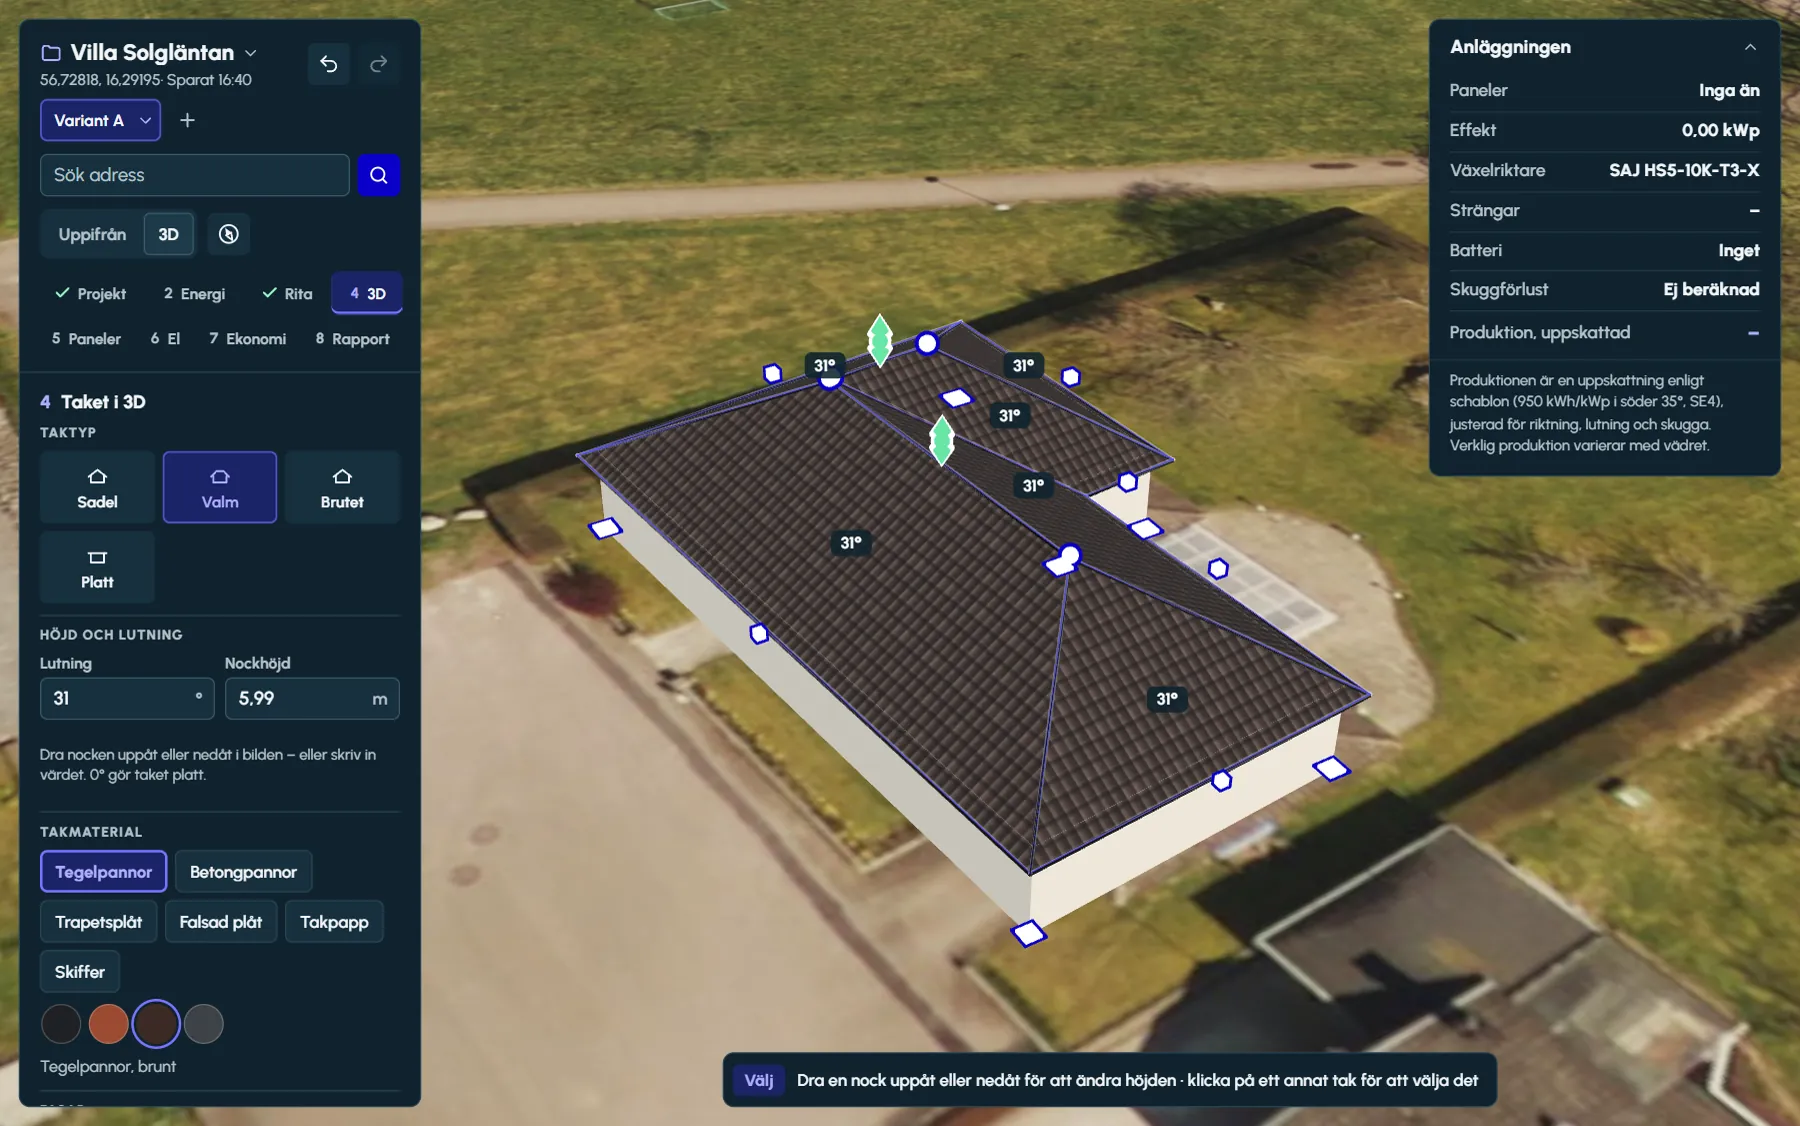
Shaped in 3D
In step 4 the house stands in 3D. Point at the ridge – it lights up – and drag it up or down. Every roof face follows and stays planar, so no face ends up warped and no roof line appears that nobody drew.
The pitch is entered in degrees, 0 to 60, and the ridge height in metres above ground. The height of the house is changed by dragging the white cubes at the eaves. The roofing is chosen from clay tiles, concrete tiles, trapezoidal sheet metal, standing-seam metal, felt and slate, each in several colours.
Double-clicking a house selects it and flies there in 3D. The roof and the facade belong to the same model, so windows, doors and a logo on the wall are added in the same step.
Your own roof lines when the house is unusual
A house that does not fit the suggestions is drawn with your own lines from above: ridge, hip, valley, gable and break line, each in its own colour. The designer guesses the type from where the line runs, and a selected line gets a small menu in the view where you change its type or delete it. Right-clicking a line opens the same menu.
A line whose end lands a few centimetres from a corner or another line is joined to it as it is drawn, so the lines meet. The lengths are shown in the view, and a length can be typed in as for the outline.
Roof lines are drawn in the plan view; the roof is shaped in 3D. Once the lines enclose the roof faces, the roof rises when you go to 3D, at the house’s pitch or 20 degrees, and you then drag the ridge to the right height.
Flat roofs and large buildings
An outline without roof lines becomes a building with a flat roof when you go to 3D. From 300 m² of floor area, the building gets six-metre walls and felt roofing by default, and the wall height can be entered up to 30 metres.
If you enter a pitch of a few degrees on a flat roof, it falls in every direction, like a low-pitch felt or metal roof. On roof faces flatter than 5 degrees, the panels can then stand on south-facing or east–west racks.
Houses in several parts, dormers and obstacles
- L-, T- and U-shaped houses are drawn as one outline, and the valleys come at the inner corners
- Garages, extensions and outbuildings are drawn as the next building part with Draw next building part, or with a click outside the house while the roof line tool is active
- A neighbouring house that casts shade is drawn the same way, as a building part of its own
- Dormers with gable, mono-pitch or hipped roofs, with width, height and their own pitch – panels under the dormer are removed
- Chimneys and vents on the roof, with a clearance margin where no panels are placed
- Trees and flagpoles on the ground: they take no roof space but cast shade in the analysis
Questions and answers
Questions and answers
Do we need to draw the roof lines ourselves?
Usually not. Draw the outline of the house and press Inner edges, and Ritwerk works out ridges, hips and valleys and raises the roof at a 20 degree pitch. Your own lines are only needed when the house does not fit the suggestions.
Can the designer handle L-, T- and U-shaped houses?
Yes. The outline is drawn with any number of corners, skewed ones included. Inner edges puts hips at the outward corners and valleys at the inward ones, and Gable gives gables at the ends of the wings.
How do we draw a flat roof on a hall?
Draw the outline without roof lines and go to 3D. The building then becomes a flat roof with walls. From 300 m² of floor area it gets six-metre walls and felt roofing by default, and the wall height is changed in the field or with the white cubes at the wall.
How accurate is the roof?
As accurate as the aerial photo and the outline you draw. The plan view zooms in to a few millimetres per pixel, corners snap at right angles and in line with each other, and dimensions from a drawing can be typed in. You set the pitch and ridge height in 3D.
How do we add a dormer?
Select the roof face and press Add dormer, or place the dormer with a click on the roof. Width, height, roof type (gable, mono-pitch or hipped) and pitch are set for the selected dormer, and you drag it into place in the view.
Read next
- Ritwerk vs SolarEdge DesignerTwo web tools – one built for SolarEdge systems, the other independent of the manufacturers.
- East–west or south on flat roofsMore kWp per m² or more kWh per kWp – the comparison with figures for four locations, ballast, walkways and fire safety.
- Shading losses on solar panelsNear shading, horizon and rows – and why a partly shaded panel loses more than its share.
- Panels and mounting systems per roof facePanel arrays per roof face, flush, east–west or south-facing, with mounting system and bill of materials.
Try it on a real roof.
The designer opens in your browser, with no account. Search for an address and start drawing.